
Welcome to this blog! This page will provide instructions on how to install and run BrayanBot on a Raspberry Pi 400 running Ubuntu 20.04. Interested? Great! Grab your popcorn, drinks, Raspberry Pi and click "Read More" to proceed.
First and foremost, happy Valentines Day everybody! If you are single, I will be your company and guide today. If not, I will only be your guide, but nevertheless; I am your guide today I hope to provide what you will need to host BrayanBot on a Raspberry Pi 400 running Ubuntu. Certainly not my favorite distribution but nevertheless, it somehow still holds the title of the most popular server distro.
If you would like to read my take on this matter, more about why you should not be using Ubuntu here.
But I digress, let us proceed with installation steps right away before I steal more of your time.
As you would expect, you will need a Raspberry Pi to connect to your server. Many people do not realise this, but Raspberry Pi is an awesome tech utility to have! You can run a website on it, or make a LEGO Tank with it. Or, as any sane person would do: you can use it to host BrayanBot, which we will do!
Installing Ubuntu on our Raspberry Pi
My Raspberry Pi 400 (like many others) came with its own Ubuntu spin, NOOBS operating system. It is a decent Ubuntu derivative that aims to introduce beginners to the basics of Linux but it also comes with Desktop Environment, which we do not need. That is exactly why we will be overwriting NOOBS with Ubuntu using this handy tool called Raspberry Imager. It can be installed on Windows MacOS and Ubuntu from downloads page. Arch Linux users may install it from the AUR using yay -S rpi-imager or yay -S rpi-imager-bin. Install Imager and run it for the first time. It will look like this:
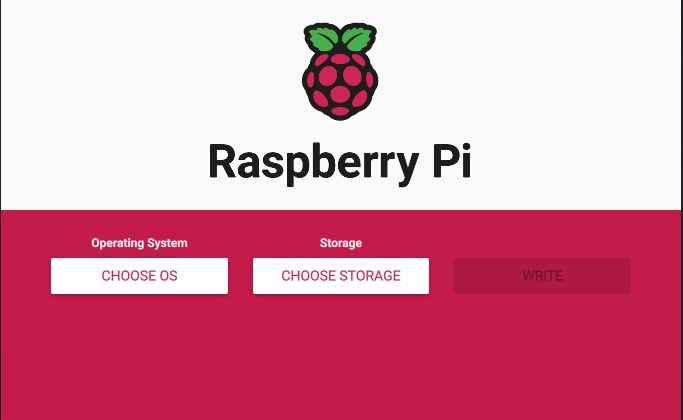
We will be choosing our operating system and storage medium, but before that I would like to talk about my personal recommendations.
Raspberry Pi 400 came with a 16GB SD card, which after around 2 weeks of use time; has proven itself to be insultingly low. If you are planning to use your Pi only to host BrayanBot, 16GB is perfectly enough; but if you have other awesome projects in mind, you might want to consider a 32 or 64 GB card.
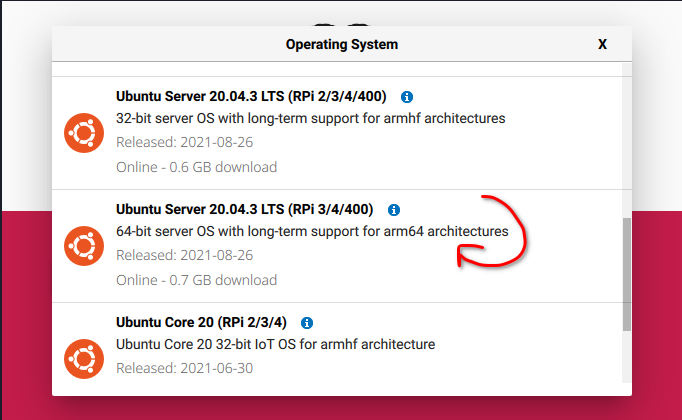
Regardless of your choice, choose your Operating System under the Choose OS tab.
For this guide, we will be going with Ubuntu 20.04 Server (64 Bit) as our operating system but depending on your preferences, you may want to go with a different version of Ubuntu or an entirely different Operating System. For those sick of Ubuntu Arch Linux is an excellent alternative, however, Manjaro may be a temporary stepping stone as installing Arch linux on a Raspberry Pi is relatively difficulty for a newbie.
Once you choose your Operating System, proceed to choosing your storage medium. I have used an 32 GB SD card in this installation but you may go as low as 16GB (any lesser might cause you problems) for this project. There are no upper limits to storage, you might as well buy a 1TB SD Card and use your Raspberry Pi as a desktop computer. Go wild!
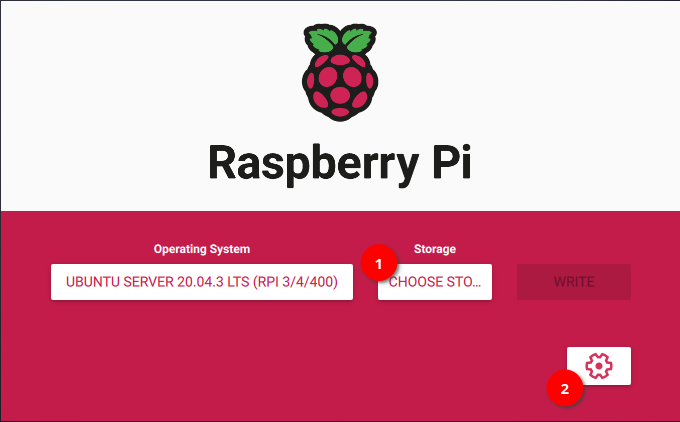
Next up, is the most important step; configuring your SSH & Network connections.
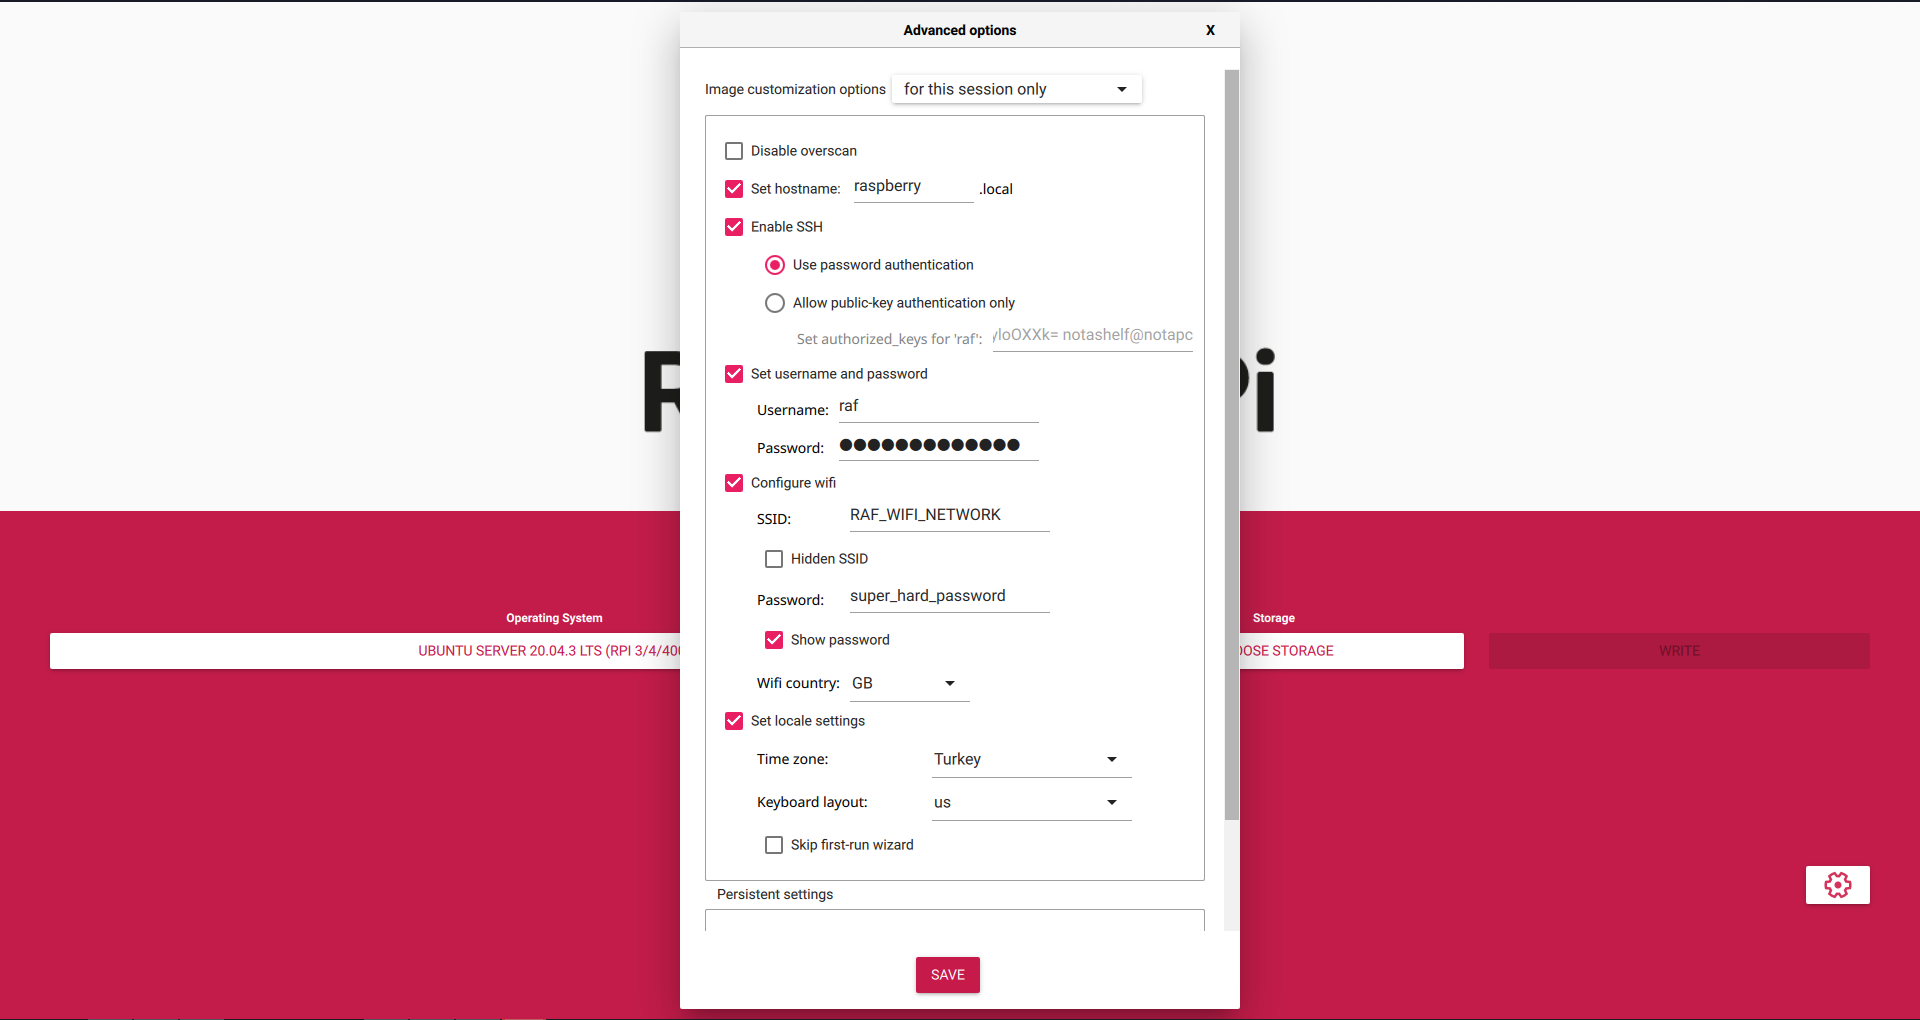
Things to note here:
Set hostname Setting
Hostname is what you will use to connect to your Raspberry. Set it to anything you would like, it can be changed later from
/etc/hostname
Enable SSH Setting
This will basically allow SSH connections to your Pi. It is important that this setting is enabled, unless you plan on plugging in a monitor and configuring it later.
Set username and password Setting
This will create your user with sudo permissions and desired password. In this example, raf is my username and it is what I will log in to the server with.
Configure Wifi Setting
Second most important setting is your Wifi. You may be planning to use your Pi connected to the internet with a cable, but if your Raspberry also has a single ethernet port like mine; you will want to use that port for a cable between your PC and Raspberry, so you can SSH locally. In this example SSID is the name of my Wifi network.
Set locale settings
While not too important, its easier to configure them on this screen rather than after connecting to your raspberry. Choose your country and keyboard layout. As my Raspberry Pi comes with an US keyboard, I went with the default, US, but you may choose to use something different if your keyboard layout is different or if you have connected your own keyboard to your Pi.
Once all important setings are configured, hit save and then press the Write button to start burning the image on your SD card. This may take a little while. Why not grab a cup of coffee while we wait?
SSHing into the Server
We have successfully installed Ubuntu on our Raspberry Pi and it is ready to go! Insert your SD card to your Raspberry Pi and plug it to a power source. My Raspberry Pi came with a desktop kit, which included a power cord and an adaptor but if you do not have it; any USB 3.0 power cable will do the trick.
Start by connecting the ethernet cable from your computer to your Raspberry Pi. This will allow you to connect from your device to the Pi without defining a static IP to your Pi and using SSH.
I already have a SSH configuration on my device and I normally use it to connect easily, but as we are intalling a fresh server onto our Raspberry Pi; you will need to set up SSH for the first time. To do that, you need to SSH into the server! How to do that, you ask? Well that's simple, we have already configured our credentials for SSH and we can use those credentials to SSH into our Pi easily. Lets open the command line (or if you are on Windows, a terminal emulator like [KiPutty or Powershell) and SSH into the server using our username and password.
Using Terminal
ssh raf@raspberry.local
This will prompt you to enter your password, which you have set during the installation. Enter your password, put on your hoodie and whisper: "I'm in" Because that was the hard part! We have successfully made it into the server.
Using Putty
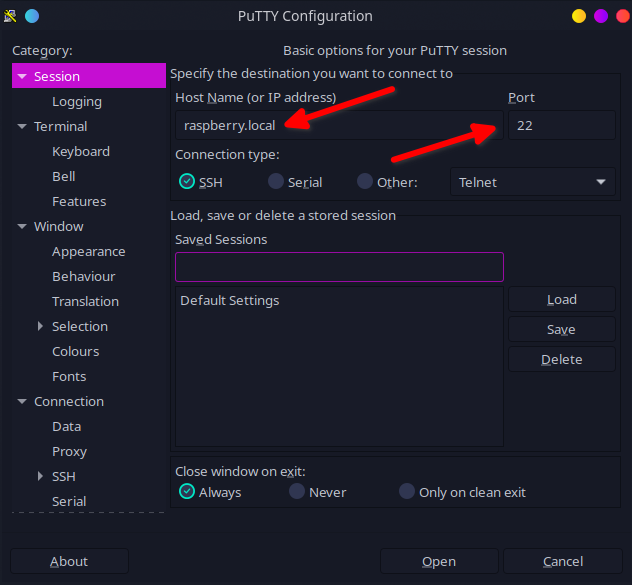
Hit open and connect to the server. You may -most probably will- see a warning about fingerprints. Hit yes, this will add your Raspberry Pi's fingerprint to your computer's trusted hosts and will not show up again. After that, you will be connected to your server. Unfortunately if you have used Putty, you do not get to put on a hoodie and whisper "I'm in" but it is a perfect time to consider switching to Linux as your operating system! No pressure.
Installing NodeJS
First and most importantly, update your packages.
sudo apt update && sudo apt upgrade
Then, you would normally run something like sudo apt install nodejs npm but NO! Since Ubuntu is a distro known for leaving their packages outdated the NodeJS from apt install is not the one we need. There are many third party repositories, one of which you may choose to install NodeJS but as the "third party" in the name indicates; they are not always trustable and thus, we will install it the right way.
The Raspberry Pi runs off the ARM architecture and as of the writing of this article, NodeJS releases compiled Linux binaries for ARMv6, ARMv7 and ARMv8 architectures, all of which you may find on their website
To find out which architecture your Raspberry Pi is running on, run the following command in the terminal
uname -m
For example, if we run the above command on the Raspberry Pi 400, we get the following output.
armv7l
Below, you will find a list of system architechtures for common Pi models but it is always a safe bet to check with uname -m as it may differ between devices despite sharing the same model number
| Board Name | Architechture |
|---|---|
| Raspberry Pi 400 | ARMv7 |
| Raspberry Pi 3 /3B+ | ARMv7 |
| Raspberry Pi 2B v1.2 | ARMv7 |
| Raspberry Pi 2B | ARMv6 |
| Raspberry Pi Zero /Zero W | ARMv6 |
We will now download the appropriate NodeJS release from NodeJS downloads page. To host BrayanBot, we will need NodeJS V16 or NodeJS V17
Once you determine the apporpriate version, for example node-v14.19.0-linux-armv7l.tar.gz for a Raspberry Pi with ARMv7 archtechture version, install the relevant package with wget node-vXX.XX.X-linux-armvXl.tar.gz (replace X with your node version and architechture) abd extract the file you have downloaded with tar -xzf node-vXX.XX.X-linux-armvXl.tar.gz. After downloading, move into the tar you have extracted with cd node-vXX.XX.X-linux-armvXl and copy the contents to PATH using sudo cp -R * /usr/local/
Before you proceed, check if your installation was successful by running node -v and npm -v If it is, proceed to the next step. If not, join our Discord Server and ask for help.
Finally, we are ready to download and install BrayanBot
Installing BrayanBot
Install Dependencies
- Debian/Ubuntu
- Arch
- RedHat/CentOS/Fedora
sudo apt install zip unzip wget
sudo pacman -S zip unzip wget
sudo dnf install zip unzip wget
Download and Install BrayanBot
- Stable
- Dev
- Download the zip file and unzip
wget https://github.com/BrayanBot/brayanbot/releases/download/latest/brayanbot.zip &
unzip brayanbot.zip
- Move into the BrayanBot Directory
cd BrayanBot
- Copy the example config to the main
config.yml
cp example.config.yml config.yml # cp is a built-in Linux command for copying files
or if you would like to simply rename the file
mv example.config.yml config.yml # mv is a built-in Linux command for moving files
- Edit your
config.yml
nano config.yml
or
vim config.yml # Imagine using vim
If you are interested in receiving updates as soon as they are out for the cost of high chance of breaking changes and less stability; you may clone into the dev branch instead of main. Changes from the dev branch will be eventually merged into main, but it is an option for those who like to live on edge.
You also must keep in mind that using git will set up version control for your bot files and will make it harder to update if you have edited default -and tracked- bot files. Do not use this branch if you do not know how to use git.
- Clone the Github Repo
git clone -b dev https://github.com/BrayanBot/BrayanBot.git
- Move into the BrayanBot Directory
cd BrayanBot
- Copy the example config to the main
config.yml
cp example.config.yml config.yml
or if you would like to rename the file instead of copying
mv example.config.yml config.yml
- Edit your
config.yml
nano config.yml
or
vim config.yml
Installing NodeJS Dependencies & Starting BrayanBot
- Yarn
- NPM
- Install Yarn
sudo npm i -g yarn
- Install Required dependencies
yarn
- Start the Bot
yarn start
- Install Required dependencies
npm install
- Start the Bot
npm run start
Power Controls
If you would like to keep the bot running after you log out of your terminal/machine; you may use PM2. It will also allow you to have BrayanBot persist between reboots, if you configure it that way.
Using PM2 Process Manager
# Install PM2 through NPM
sudo npm install -g pm2
# Start BrayanBot with PM2
pm2 start index.js --name brayanbot
pm2 stop brayanbot# Stops the pm2 processpm2 restart brayanbot# Restart the processpm2 logs brayanbot# View recent logs as well as a live consolepm2 logs brayanbot --lines 1000 | nc termbin.com 9999# Export the bot's past logs and paste them to termbin.
Final Thoughts
And that's it, that is all you need to do to start hosting BrayanBot without additional hosting costs. Of course, leaving a Raspberry Pi running 24/7 is not the most reliable way of running a service, BUT, using a Raspberry Pi creates an excellent sandbox for you get into using Linux and understanding the basics of running/securing a server without additional costs or risks. Once you feel comfortable with using this new server on your Raspberry Pi, you should consider taking a look at my Securing your Linux Server guide. As some of our users have decided to purchase VPSes to run BrayanBot, we felt obligated to provide necessary instructions on securing your server. If you find this guide helpful, I'm glad! If you think it was the most unhelpful guide you have ever read, please let me know, so I can improve it. And if you just want to talk Linux, that's fine too! Join our Support Server where we can talk freely.
With that said, I really do hope this guide was useful, thank you for your time.